- Creating a Scrum project
- Adding resources to the project
- Adding Sprints to the project (a Sprint in Scrum is like a "timebox" in other methods)
- Adding Backlog Items to the project (Backlog Items are the tasks the project must achieve)
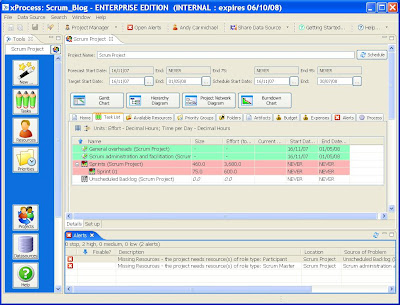
At this point take a look at the set of tasks that are already in the project (hitting the "Tasks" button is the quickest way to do this. Here's what you might see (click on the image to make it full size).

There are:
- some overhead tasks (green because they have fixed start and end dates and are within the target dates of the project)
- A "Sprints" parent task containing one sprint "Sprint 01" (these tasks are red since they have NEVER end dates, clearly after the project target)
- An "Unscheduled Backlog" (which is grey as this task is specified as not to be scheduled, also resulting in NEVER end dates).
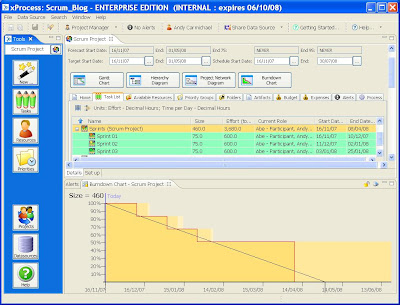
At this point we should see actual end dates appearing for the Sprints and the overall project and we can even see a Gantt chart and projected Burndown chart. The Burndown chart is slightly more interesting if we add 2 more Sprints to the project (hit the "New" button and select "Sprint"). Then hit the "Burndown Chart" button on the project pane and you should see something like this:
 Now it's important to note that as yet we've entered very little information about this project other than the number of Sprints and the people on the project and their availability. The projected burndown is only reflecting this simple data showing when the work in each Sprint (based on estimates for the amount of work in a Sprint which is modifiable in the process definition or, for a specific Sprint by modifying the estimates in its "Required Resources"). To use Scrum in earnest we need some actual "Backlog Items". Backlog Items are identifiable tasks that in a software development project for example could correspond to features to be built or defects to be corrected. The next step therefore is to add such items.
Hit the "New" button again and select "Backlog Item" (and then "Next"). We have a choice of the 3 Sprints we've defined or the "Unscheduled Backlog" as valid parent tasks for these items. Setting the parent task as Unscheduled Backlog means that we can create a set of tasks without them changing the scheduling of the project. We can then decide later in which Sprint specific tasks should be completed. So with Unscheduled Backlog as the parent task you can give the backlog iten a name and a size (size is measured in "ideal days" by the way), and hit "Finish" and the task will created. If you already have a list of tasks you can copy and paste a comma-separated list into the name field of the "New" dialog, check the "Create Multiple" check-box and several items will be created in one go.
Now we have a project some resources and set of tasks to be completed. The next step is prioritising. We'll look at that in the next posting in this series.


No comments:
Post a Comment